This documentation is available as Markdown for AI agents and LLMs. See the full Markdown index or append .md to any documentation URL.
截图
编辑页面
在本教程中,学习如何使用第三方库和 Expo Media Library 捕获屏幕截图。
在本章中,我们将学习如何使用第三方库截取屏幕截图,并将其保存到设备的媒体库中。我们将使用 react-native-view-shot 来截取屏幕截图,并使用 expo-media-library 将图片保存到设备的媒体库中。
提示 到目前为止,我们已经使用了第三方库,例如
react-native-gesture-handler、react-native-reanimated。根据不同的使用场景,我们可以在 React Native Directory 中找到数百个其他第三方库。
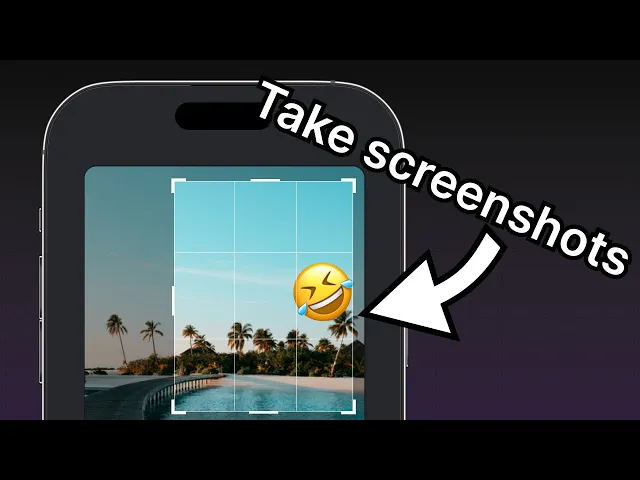
使用 react-native-view-shot 捕获屏幕截图,并使用 expo-media-library 将其保存到设备的媒体库中。
1
2
请求权限
需要访问敏感信息的应用,例如访问设备媒体库,必须提示用户授予或拒绝访问权限。使用 expo-image-picker 中的 useMediaLibraryPermissions() hook,我们可以使用 permissionResponse 和 requestPermission() 方法来请求访问权限。这个 hook 会同时请求读取和写入权限,这既涵盖了从媒体库中选择图片,也涵盖了将截图保存到其中。
当应用首次加载且权限状态既不是已授予也不是已拒绝时,permissionResponse 的值为 null。当被请求权限时,用户可以授予或拒绝权限。我们可以添加一个条件来检查它是否未被授予。如果未被授予,就触发 requestPermission() 方法。获取访问权限后,permissionResponse 的值会变为 granted。
将以下代码片段添加到 src/app/(tabs)/index.tsx 中:
import { useEffect, useState } from 'react'; import * as ImagePicker from 'expo-image-picker'; // ...其余代码保持不变 export default function Index() { const [permissionResponse, requestPermission] = ImagePicker.useMediaLibraryPermissions(); // ...其余代码保持不变 useEffect(() => { if (!permissionResponse?.granted) { requestPermission(); } }, []); // ...其余代码保持不变 }
3
创建一个 ref 来保存当前视图
我们将使用 react-native-view-shot 允许用户在应用内截取屏幕截图。这个库会使用 captureRef() 方法将 <View> 的截图捕获为图像。它会返回所捕获截图图像文件的 URI。
- 从
react-native-view-shot导入captureRef,并从 React 导入useRef。 - 创建一个
imageRef引用变量来保存所捕获截图的引用。 - 将
<ImageViewer>和<EmojiSticker>组件包裹在一个<View>中,然后把引用变量传给它。
import { useState, useRef } from 'react'; import { captureRef } from 'react-native-view-shot'; export default function Index() { const imageRef = useRef<View>(null); // ...其余代码保持不变 return ( <GestureHandlerRootView style={styles.container}> <View style={styles.imageContainer}> <View ref={imageRef} collapsable={false}> <ImageViewer imgSource={PlaceholderImage} selectedImage={selectedImage} /> {pickedEmoji && <EmojiSticker imageSize={40} stickerSource={pickedEmoji} />} </View> </View> {/* ...其余代码保持不变 */} </GestureHandlerRootView> ); }
在上面的代码片段中,collapsable 属性被设置为 false。这使得 <View> 组件只对背景图片和表情贴纸进行截图。
4
捕获截图并保存
我们可以在 onSaveImageAsync() 函数内部调用 react-native-view-shot 的 captureRef() 方法来捕获视图截图。它接受一个可选参数,我们可以传入截图区域的 width 和 height。关于可用选项的更多信息,请参阅该库的文档。
captureRef() 方法还会返回一个 promise,该 promise 会在截图的 URI 可用时完成。我们将把这个 URI 作为参数传递给 MediaLibrary.saveToLibraryAsync(),并将截图保存到设备的媒体库中。
在 app/(tabs)/index.tsx 中,使用以下代码更新 onSaveImageAsync() 函数:
import * as ImagePicker from 'expo-image-picker'; import * as MediaLibrary from 'expo-media-library'; import { useEffect, useRef, useState } from 'react'; import { ImageSourcePropType, StyleSheet, View } from 'react-native'; import { GestureHandlerRootView } from 'react-native-gesture-handler'; import { captureRef } from 'react-native-view-shot'; import Button from '@/components/Button'; import CircleButton from '@/components/CircleButton'; import EmojiList from '@/components/EmojiList'; import EmojiPicker from '@/components/EmojiPicker'; import IconButton from '@/components/IconButton'; import ImageViewer from '@/components/ImageViewer'; import EmojiSticker from '@/components/EmojiSticker'; const PlaceholderImage = require('@/assets/images/background-image.png'); export default function Index() { const [selectedImage, setSelectedImage] = useState<string | undefined>( undefined ); const [showAppOptions, setShowAppOptions] = useState<boolean>(false); const [isModalVisible, setIsModalVisible] = useState<boolean>(false); const [pickedEmoji, setPickedEmoji] = useState< ImageSourcePropType | undefined >(undefined); const [permissionResponse, requestPermission] = ImagePicker.useMediaLibraryPermissions(); const imageRef = useRef<View>(null); useEffect(() => { if (!permissionResponse?.granted) { requestPermission(); } }, []); const pickImageAsync = async () => { let result = await ImagePicker.launchImageLibraryAsync({ mediaTypes: ['images'], allowsEditing: true, quality: 1, }); if (!result.canceled) { setSelectedImage(result.assets[0].uri); setShowAppOptions(true); } else { alert('你没有选择任何图片。'); } }; const onReset = () => { setShowAppOptions(false); }; const onAddSticker = () => { setIsModalVisible(true); }; const onModalClose = () => { setIsModalVisible(false); }; const onSaveImageAsync = async () => { try { const localUri = await captureRef(imageRef, { height: 440, quality: 1, }); await MediaLibrary.saveToLibraryAsync(localUri); if (localUri) { alert('已保存!'); } } catch (e) { console.log(e); } }; return ( <GestureHandlerRootView style={styles.container}> <View style={styles.imageContainer}> <View ref={imageRef} collapsable={false}> <ImageViewer imgSource={PlaceholderImage} selectedImage={selectedImage} /> {pickedEmoji && <EmojiSticker imageSize={40} stickerSource={pickedEmoji} />} </View> </View> {showAppOptions ? ( <View style={styles.optionsContainer}> <View style={styles.optionsRow}> <IconButton icon="refresh" label="重置" onPress={onReset} /> <CircleButton onPress={onAddSticker} /> <IconButton icon="save-alt" label="保存" onPress={onSaveImageAsync} /> </View> </View> ) : ( <View style={styles.footerContainer}> <Button theme="primary" label="选择一张照片" onPress={pickImageAsync} /> <Button label="使用这张照片" onPress={() => setShowAppOptions(true)} /> </View> )} <EmojiPicker isVisible={isModalVisible} onClose={onModalClose}> <EmojiList onSelect={setPickedEmoji} onCloseModal={onModalClose} /> </EmojiPicker> </GestureHandlerRootView> ); } const styles = StyleSheet.create({ container: { flex: 1, backgroundColor: '#25292e', alignItems: 'center', }, imageContainer: { flex: 1, }, footerContainer: { flex: 1 / 3, alignItems: 'center', }, optionsContainer: { position: 'absolute', bottom: 80, }, optionsRow: { alignItems: 'center', flexDirection: 'row', }, });
现在,在应用中选择一张照片并添加一个贴纸。然后点击“保存”按钮。我们应该会在 Android 和 iOS 上看到以下结果:
Summary
Chapter 7: Take a screenshot
We've successfully used react-native-view-shot and expo-media-library to capture a screenshot and save it on the device's library.
In the next chapter, let's learn how to handle the differences between mobile and web platforms to implement the same functionality on web.